Code Generation - JavaScript
Getting started with TypeSpec server code generation for JavaScript
Section titled “Getting started with TypeSpec server code generation for JavaScript”TypeSpec’s code generation capabilities allow you to rapidly build a working API service starting from a TypeSpec definition. This guide walks you through the entire process, from installation to creating and customizing your generated service using the JavaScript server emitter.
Prerequisites
Section titled “Prerequisites”- Node.js and NPM (required for both TypeSpec and JavaScript server code generation)
- Basic familiarity with TypeSpec
- Basic knowledge of JavaScript/TypeScript and Express.js
1. Installing TypeSpec
Section titled “1. Installing TypeSpec”npm install -g @typespec/compiler@latestThis installs the TypeSpec compiler globally on your system, making the tsp command available.
2. Creating a TypeSpec project
Section titled “2. Creating a TypeSpec project”- Create and navigate to your project directory:
mkdir myprojectcd myproject- Initialize a new TypeSpec project:
tsp init-
Select the appropriate template when prompted:
- Choose “Generic REST API” to create a standard REST API
- Enter a project name or accept the default
- Select “JavaScript Server Stubs” from the emitter options
-
After initialization completes, your project structure will include:
main.tsp- Your TypeSpec definition file with a sample servicetspconfig.yaml- Configuration for your emitterspackage.json- Project dependencies
3. Understanding the default TypeSpec service
Section titled “3. Understanding the default TypeSpec service”The main.tsp file contains a default “Widget Service” example that defines:
import "@typespec/http";
using TypeSpec.Http;@service(#{ title: "Widget Service" })namespace DemoService;
model Widget {  id: string;  weight: int32;  color: "red" | "blue";}
model WidgetList {  items: Widget[];}
@errormodel Error {  code: int32;  message: string;}
model AnalyzeResult {  id: string;  analysis: string;}
@route("/widgets")@tag("Widgets")interface Widgets {  /** List widgets */  @get list(): WidgetList | Error;  /** Read widgets */  @get read(@path id: string): Widget | Error;  /** Create a widget */  @post create(@body body: Widget): Widget | Error;  /** Update a widget */  @patch update(@path id: string, @body body: Widget): Widget | Error;  /** Delete a widget */  @delete delete(@path id: string): void | Error;
  /** Analyze a widget */  @route("{id}/analyze") @post analyze(@path id: string): AnalyzeResult | Error;}
This defines:
- A
Widgetmodel with properties for id, weight, and color - A REST API with standard CRUD operations (list, read, create, update, delete)
- A special
analyzeoperation for widgets
The tspconfig.yaml file configures your emitters:
emit: - "@typespec/openapi3" - "@typespec/http-server-js"options: "@typespec/openapi3": emitter-output-dir: "{output-dir}/schema" openapi-versions: - 3.1.0 "@typespec/http-server-js": emitter-output-dir: "{output-dir}/server/generated"This configuration:
- Generates OpenAPI 3.1.0 schema in the
tsp-output/schemadirectory - Generates JavaScript server code in the
tsp-output/server/generateddirectory
4. Scaffolding your service
Section titled “4. Scaffolding your service”The next step is to generate the server code from your TypeSpec definition. This process is called “scaffolding”.
npx hsjs-scaffoldThe console will display information about what it generated and where it placed the files, including:
- The location of your generated project
- How to run the project
When scaffolding is finished, you’ll see output similar to the following:
[hsjs] Project is ready to run. Use `npm start` to launch the server.[hsjs] A debug configuration has been created for Visual Studio Code.[hsjs] Try `code tsp-output/server/generated` to open the project and press F5 to start debugging.[hsjs] The newly-generated route controllers in 'tsp-output/server/generated/src/controllers' are ready to be implemented.[hsjs] Done.5. Running your service
Section titled “5. Running your service”Navigate to your generated project directory and start the server:
cd tsp-output/server/generatednpm run startOnce the server is up and running, you can access the Swagger UI by navigating to http://localhost:3000/.api-docs in your browser.
You should see a Swagger UI interface that lists all the available API endpoints, allowing you to test them directly from your browser:
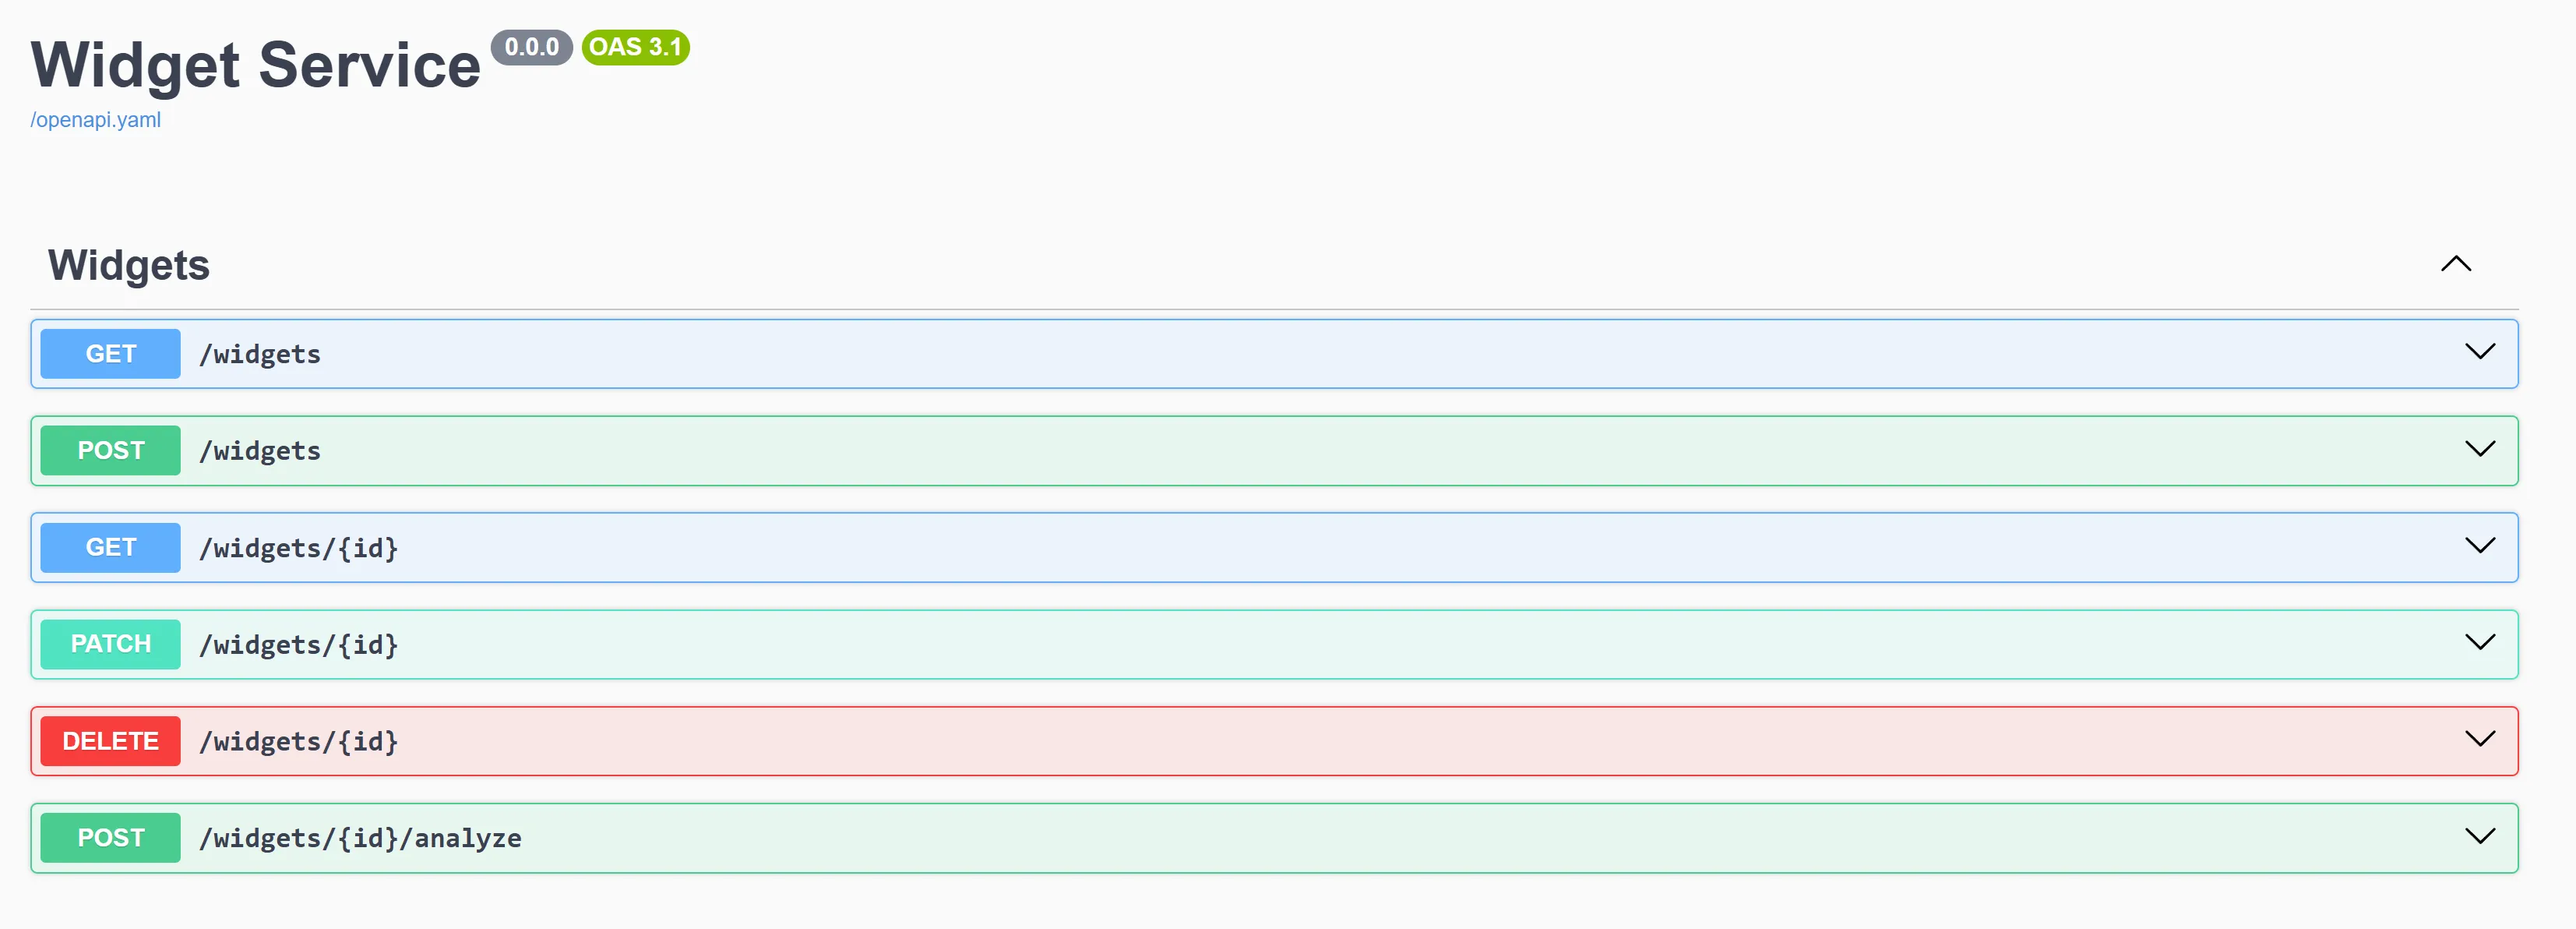
This UI allows you to:
- View all available API endpoints
- Test API operations directly
- See request and response formats
6. Understanding the generated code
Section titled “6. Understanding the generated code”The generated code is organized into two main categories:
Regenerated implementation (don’t modify directly)
Section titled “Regenerated implementation (don’t modify directly)”Located in the src/generated directory, these files will be regenerated whenever you recompile your TypeSpec definition. If you modify these files, your modifications will be overwritten every time you run tsp compile. Your code may need to import and use methods or types from these files, but do not modify them as your modifications will not be preserved.
-
Helpers: Located in
src/generated/helpers, these files contain common implementation used by the generated code.- Example:
helpers/router.tscontains common types and implementation for the generated router. - Your code may need to import and use methods/types from these helpers, but you never need to modify them.
- Example:
-
HTTP Infrastructure: Located in
src/generated/http, these files define the HTTP implementation layer for the server.- Example:
http/router.tscontains the implementation of the service router that dispatches requests to the route handlers. - Example:
http/operations/server-raw.tscontains the individual route handlers that handle parsing types from requests and serializing them to responses. - These files handle the HTTP infrastructure. Your code will create an instance of the router in
http/router.ts, but otherwise does not need to interact with this code directly.
- Example:
-
Data Models and Operation Interfaces: Located in
src/generated/models, these files define the data types that represent the API types defined in the TypeSpec specification.- Example:
models/all/demo-service.tscontains the interfaces that represent theWidgetdata type and theWidgetsoperations interface. - Your code will import and use these types to define implementations of the route controllers that define the business logic of your service.
- Example:
User implementation
Section titled “User implementation”These files are not regenerated automatically when your specification is recompiled. They are generated once by the scaffolding tool, but the scaffolding tool will not overwrite them if they already exist because they are intended to be modified according to your needs. If you want to regenerate a scaffolded file that is in this category, you must delete it first, and then the scaffolding tool will replace it the next time it is run.
These files are all located in the output directory tsp-output/server/generated, but none of them are located within the src/generated folder of the emitter output directory.
-
Project files: these files define the structure of the project, its dependencies, and build scripts
- Examples:
package.json,tsconfig.json,.vscode/which all define the project structure. - You can customize these files to your liking, for example by adding new dependencies or changing TypeScript config settings.
- Examples:
-
Route controllers: Implementations of the operation interfaces that define the business logic layer.
- Example:
src/controllers/widgets.tscontains the scaffolded implementation of theWidgetsinterface. - These controllers are passed in to the router and define the business logic of your app.
- The scaffolding system generates “mock” implementations that either return made-up values or throw
NotImplementedError. - These files are not overwritten when you recompile, so you can edit them to add the correct logic for your service.
- Example:
-
Server entrypoint: Located in
src/index.ts, this file defines the entrypoint of the server process.- This file creates an Express app and an instance of the generated router, then binds them together and starts the Express app.
- You can change this file to add middleware, custom routes, etc. to the express app as needed.
7. Understanding the middleware and routing system
Section titled “7. Understanding the middleware and routing system”The generated JavaScript server uses a router that provides an Express.js middleware. It is added to the express app with app.use(router.expressMiddleware). The generated router is created with instances of the route controllers, and Express will call the router as part of its middleware chain:
- Express receives a request and passes it through the middleware chain.
- When/if the generated router middleware is reached, it checks if the request matches one of its routes. If it does, it processes the request and then calls your business logic implementation defined by the route controller in
src/controllersthat was passed to the router when it was created. - If the route does not match, the router sends the request to the next middleware in the chain.
The router is bound to the Express app in src/index.ts by the scaffolded server code. The entrypoint file:
- Sets up Express middleware (SwaggerUI, logging, etc.).
- Adds the router middleware.
- Binds the app to a Node HTTP server and listens for incoming requests.
You can customize the entrypoint to add your own middleware, custom routes, etc.
8. Adding your business logic
Section titled “8. Adding your business logic”-
Locate the route controller implementation files for your service (e.g.,
tsp-output/server/generated/src/controllers/widgets.ts). -
Update the implementation methods with your actual business logic. For example:
// Replace the mock implementation with your actual business logicasync list(ctx: HttpContext): Promise<WidgetList | Error> { // In a real application, you would call a database or execute some logic to construct the correct response. return { items: [ { id: "mock-string", weight: 42, color: "red", } ], };}- The implementation file won’t be overwritten when you recompile your TypeSpec, preserving your business logic.
9. Evolving your API
Section titled “9. Evolving your API”As your API evolves, you’ll need to update your TypeSpec definition and regenerate code:
-
Modify your TypeSpec definition (e.g., add new models or operations)
-
Recompile to update the generated code:
tsp compile .This updates the generated files (routes, interfaces, models) but preserves your implementation files.
- If you’ve added entirely new resources that require new implementation files:
npx hsjs-scaffoldRunning the scaffolding command again will create any new files that don’t already exist, but won’t update files that you may have modified.
This is particularly useful when you’ve added new interfaces in your TypeSpec. For example, if you add a new Categories interface:
@route("/categories")@tag("Categories")interface Categories { /** List categories */ @get list(): CategoryList | Error; // More operations...}When you run the scaffolding step again:
- It will create new files for the new
Categoriesinterface (src/controllers/categories.ts). - It won’t overwrite your existing
widgets.tswith your custom business logic. - This allows you to incrementally add new resources without losing your existing implementations.
NOTE: You will need to either delete the entrypoint src/index.ts and allow it to be scaffolded again (which will overwrite any modifications you have made to the entrypoint) or modify it to add an instance of the Categories controller to the router, otherwise the router will be missing an implementation of Categories!
Next steps
Section titled “Next steps”- Add authentication middleware to your service
- Implement data validation and error handling
- Connect your implementation to a database (like MongoDB, PostgreSQL, etc.)
- Deploy your service to a cloud provider