Code Generation - C#
Getting started with TypeSpec server code generation for C#
Section titled “Getting started with TypeSpec server code generation for C#”TypeSpec’s code generation capabilities allow you to rapidly build a working API service starting from a TypeSpec definition. This guide walks you through the entire process, from installation to creating and customizing your generated service using the C# server emitter.
Prerequisites
Section titled “Prerequisites”- .NET 9 installed (required for C# server code generation)
- Node.js and npm (for the installation method)
- Basic familiarity with TypeSpec
1. Installing TypeSpec
Section titled “1. Installing TypeSpec”npm install -g @typespec/compiler@latestThis installs the TypeSpec compiler globally on your system, making the tsp command available.
2. Creating a TypeSpec project
Section titled “2. Creating a TypeSpec project”- Create and navigate to your project directory:
mkdir myprojectcd myproject- Initialize a new TypeSpec project:
tsp init-
Select the appropriate template when prompted:
- Choose “Generic REST API” to create a standard REST API
- Enter a project name or accept the default
- Select “C# Server Stubs” from the emitter options
-
After initialization completes, your project structure will include:
main.tsp- Your TypeSpec definition file with a sample servicetspconfig.yaml- Configuration for your emitterspackage.json- Project dependencies
3. Understanding the default TypeSpec service
Section titled “3. Understanding the default TypeSpec service”The main.tsp file contains a default “Widget Service” example that defines:
import "@typespec/http";
using TypeSpec.Http;@service(#{ title: "Widget Service" })namespace DemoService;
model Widget {  id: string;  weight: int32;  color: "red" | "blue";}
model WidgetList {  items: Widget[];}
@errormodel Error {  code: int32;  message: string;}
model AnalyzeResult {  id: string;  analysis: string;}
@route("/widgets")@tag("Widgets")interface Widgets {  /** List widgets */  @get list(): WidgetList | Error;  /** Read widgets */  @get read(@path id: string): Widget | Error;  /** Create a widget */  @post create(@body body: Widget): Widget | Error;  /** Update a widget */  @patch update(@path id: string, @body body: Widget): Widget | Error;  /** Delete a widget */  @delete delete(@path id: string): void | Error;
  /** Analyze a widget */  @route("{id}/analyze") @post analyze(@path id: string): AnalyzeResult | Error;}
This defines:
- A
Widgetmodel with properties for id, weight, and color - A REST API with standard CRUD operations (list, read, create, update, delete)
- A special
analyzeoperation for widgets
The tspconfig.yaml file configures your emitters:
emit: - "@typespec/openapi3" - "@typespec/http-server-csharp"options: "@typespec/openapi3": emitter-output-dir: "{output-dir}/schema" openapi-versions: - 3.1.0 "@typespec/http-server-csharp": emitter-output-dir: "{output-dir}/server/generated"This configuration:
- Generates OpenAPI 3.1.0 schema in the
tsp-output/schemadirectory - Generates C# server code in the
tsp-output/server/generateddirectory
4. Scaffolding your service
Section titled “4. Scaffolding your service”The next step is to generate the server code from your TypeSpec definition. This process is called “scaffolding”.
npx hscs-scaffold . --use-swaggerui --overwriteNote about
npx: Thenpxcommand executes binaries from your local node_modules directory. This ensures you’re using the version of the scaffold tool installed in your project, which is especially useful if you have multiple TypeSpec projects with different versions.
The --use-swaggerui flag adds a Swagger UI endpoint to your generated service. This is useful during development as it allows you to interact with your API directly from a browser.
The console will display information about what it generated and where it placed the files, including:
- The location of your generated project
- How to run the project
- Where to access the Swagger UI
You’ll see output similar to this:
Your project was successfully created at "tsp-output/server/aspnet"
You can build and start the project using 'dotnet run --project "tsp-output/server/aspnet"'You can browse the swagger UI to test your service using 'start https://localhost:7348/swagger/'
5. Running your service
Section titled “5. Running your service”Run the generated service using the following command:
dotnet run --project "tsp-output/server/aspnet"Once the server is up and running, you can access the Swagger UI by navigating to https://localhost:<port>/swagger in your browser, replacing <port> with the port listed in the console output, which in the example above is 7348.
You should see a Swagger UI interface that lists all the available API endpoints, allowing you to test them directly from your browser:
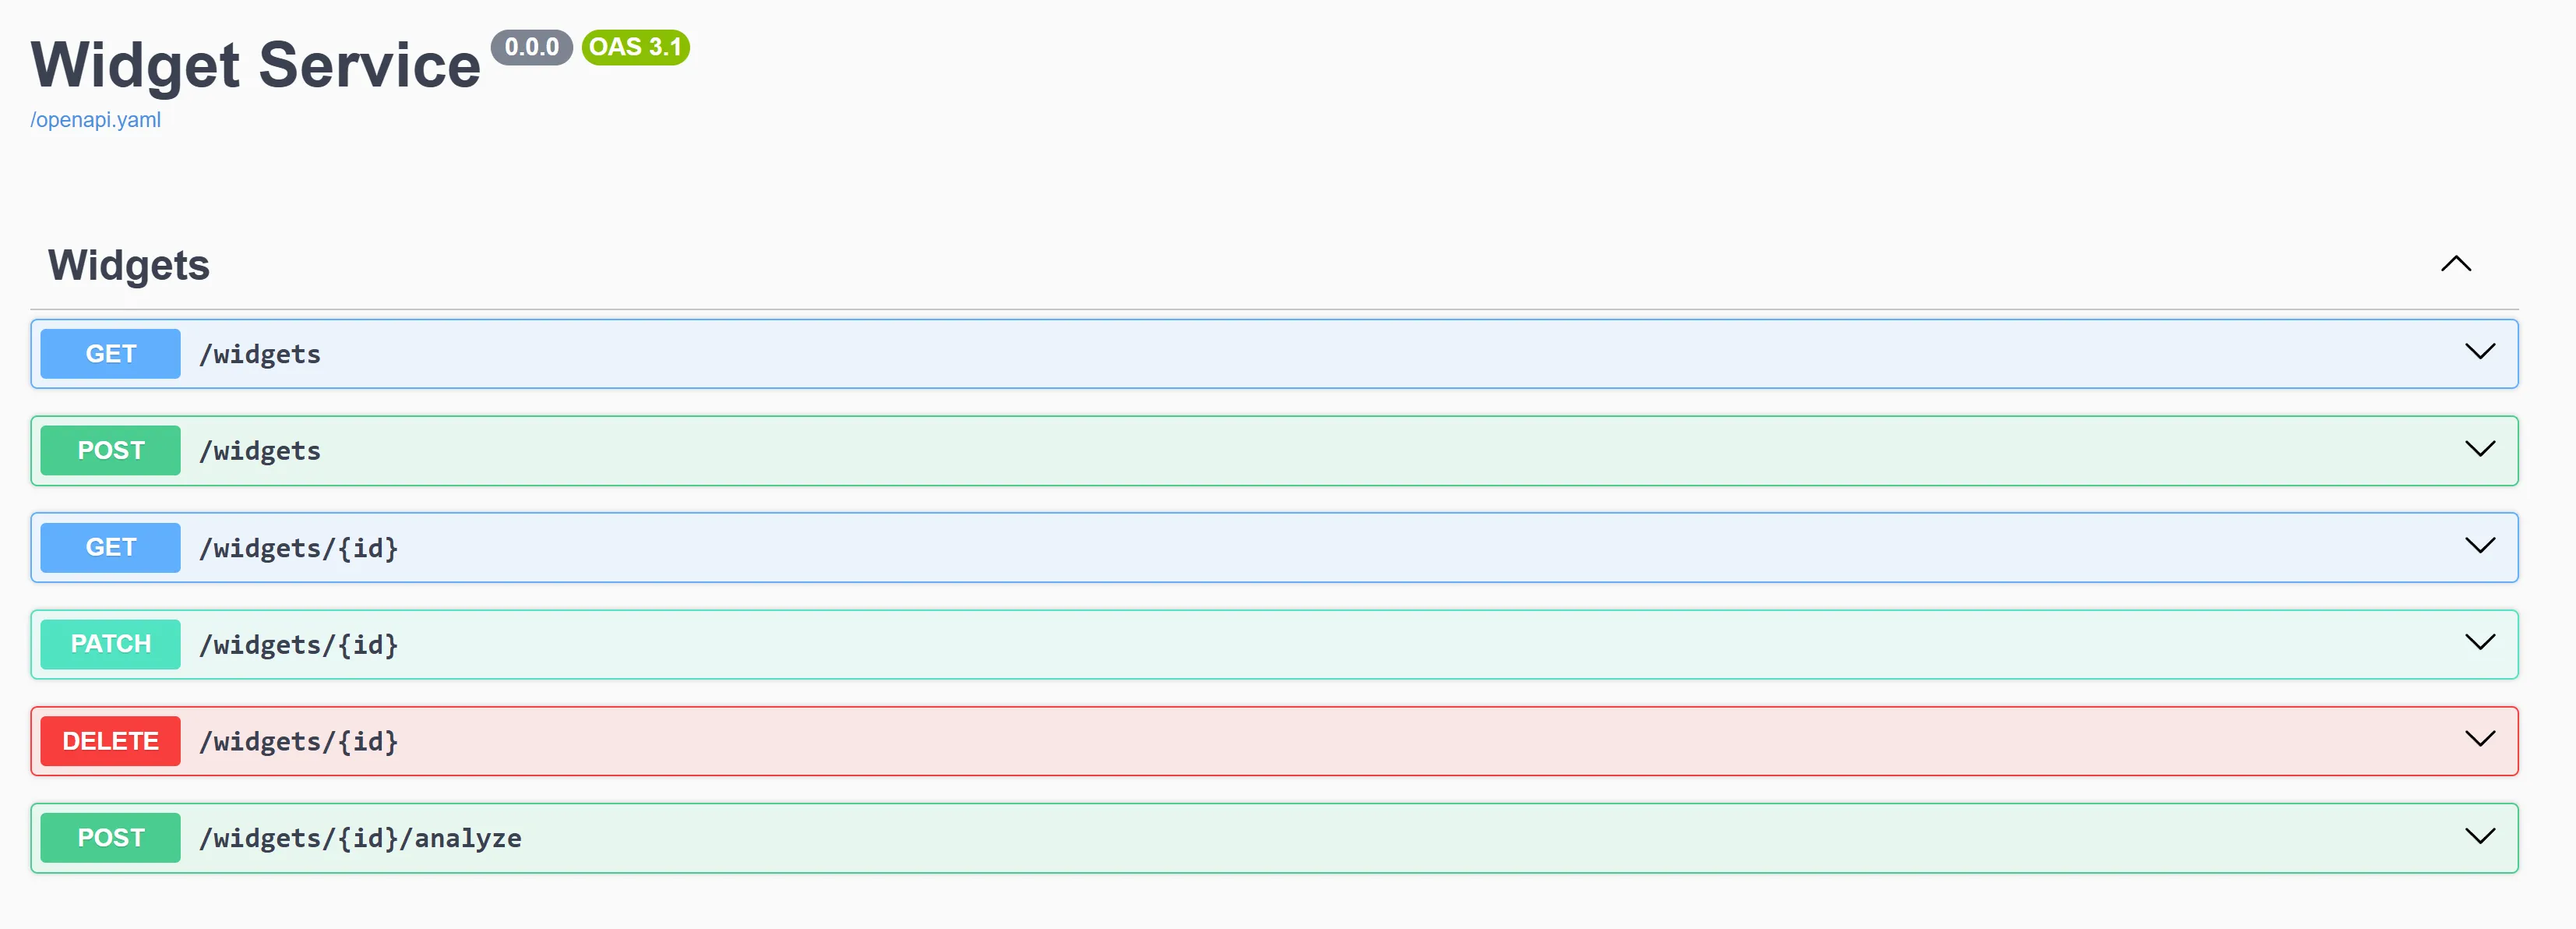
This UI allows you to:
- View all available API endpoints
- Test API operations directly
- See request and response formats
6. Understanding the generated code
Section titled “6. Understanding the generated code”The scaffolded code is organized into two main categories:
Generated files (don’t modify directly)
Section titled “Generated files (don’t modify directly)”Located in the generated directory, these files will be regenerated whenever you recompile your TypeSpec definition:
-
Controllers: Front-end API endpoints that receive HTTP requests
- Example:
WidgetsController.cshandles requests to/widgets - Each controller method maps to an operation in your TypeSpec interface
- Example:
-
Operations interfaces: Definitions for your business logic
- Example:
IWidgets.csdefines methods likeListWidgetsAsync() - These interfaces are what your implementation will need to fulfill
- Example:
-
Models: Data structures for requests and responses
- Example:
Widget.cs,WidgetList.cs - These directly represent the models defined in your TypeSpec
- Example:
Customizable files
Section titled “Customizable files”These files are intended for you to modify with your implementation:
-
Implementation classes: Mock implementations of your operations interfaces
- Example:
Widgets.csis where you’ll add your business logic - The emitter generates these with mock implementations that return syntactically correct responses
- These files won’t be overwritten when you recompile, preserving your business logic
- Example:
-
Program.cs: Application entry point and service configuration
-
MockRegistration.cs: Dependency injection configuration
- This file connects your implementation classes to the controller interfaces
- If you create custom service classes, you’ll register them here
7. Understanding the dependency injection system
Section titled “7. Understanding the dependency injection system”The generated C# service uses ASP.NET Core’s dependency injection system to connect controllers with your business logic:
- Controllers defined in the
generatedfolder depend on interface types (likeIWidgets) - Your implementation classes (like
Widgets) implement these interfaces - The
MockRegistration.csfile registers your implementations with the dependency injection container - When a request comes in, the controller receives it and calls your implementation
If you need to register additional services or dependencies, you would add them to the MockRegistration.cs file.
8. Adding your business logic
Section titled “8. Adding your business logic”-
Locate the implementation file for your service (e.g.,
Widgets.cs) -
Update the implementation methods with your actual business logic. For example:
public async Task<Widget[]> ListAsync(){ // Replace the mock implementation with your actual database query return new Widget[] { new Widget { Id = "1", Weight = 10, Color = "red" }, new Widget { Id = "2", Weight = 15, Color = "blue" } };}- The implementation file won’t be overwritten when you recompile your TypeSpec, preserving your business logic.
9. Evolving your API
Section titled “9. Evolving your API”As your API evolves, you’ll need to update your TypeSpec definition and regenerate code:
-
Modify your TypeSpec definition (e.g., add new models or operations)
-
Recompile to update the generated code:
tsp compile .This updates the generated files (controllers, interfaces, models) but preserves your implementation files.
- If you’ve added entirely new resources that require new implementation files:
npx hscs-scaffold main.tspThis is particularly useful when you’ve added new interfaces in your TypeSpec. For example, if you add a new Categories interface:
@route("/categories")@tag("Categories")interface Categories { /** List categories */ @get list(): CategoryList | Error; // More operations...}When you run the scaffolding step again:
- It will create new files for the new
Categoriesinterface (CategoriesController.cs,ICategories.cs, andCategoriesImpl.cs) - It won’t overwrite your existing
Widgets.cswith your custom business logic - This allows you to incrementally add new resources without losing your existing implementations
10. Advanced customization options
Section titled “10. Advanced customization options”When scaffolding your service, you can use additional options for customization:
npx hscs-scaffold main.tsp --helpSome useful options include:
--project-name <name>: Set a custom project name--https-port <port>: Set a different HTTPS port--output <path>: Generate files to a different location--overwrite: Overwrite existing files (use with caution)- Normally, implementation files that already exist won’t be overwritten
- Use this flag if you want to reset your implementations back to the generated mock versions
Next steps
Section titled “Next steps”- Explore the included README and documentation in the
docsfolder of your generated project - Add authentication mechanisms to your service
- Implement data validation and error handling
- Connect your implementation to a database